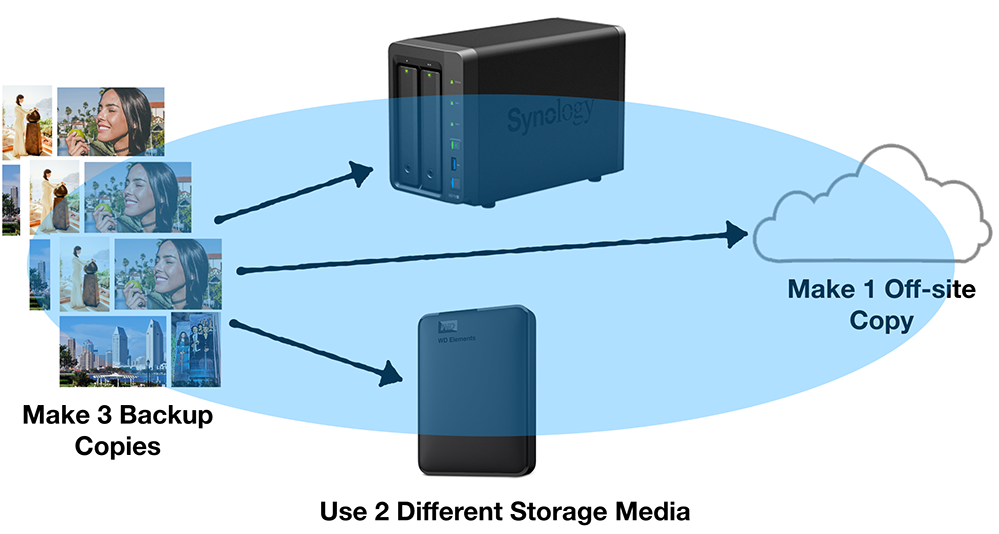
The 3 2 1 backup rule is a data protection strategy recommending three copies of your data: two on different media or platforms and one stored off-site. Synology, a leading NAS solutions provider, facilitates this rule by offering tools for local backups, hybrid cloud solutions, and off-site storage. By leveraging Synology's features, users can implement the 3 2 1 rule efficiently, ensuring data safety and easy recovery.
Understanding the 3 2 1 Backup Rule
The 3 2 1 backup rule is a fundamental principle in the world of data protection. It's a strategy that ensures data safety by recommending a specific structure for storing backup copies. Let's delve deeper into its components and benefits.
The Three Components Explained
The 3 2 1 backup rule is straightforward:
- 3 Copies of Data: Always have at least three copies of your data. This includes the original data and two backup copies. By having multiple copies, you reduce the risk of data loss. For instance, if one backup fails, you still have another to fall back on.
- 2 Different Media: Store these copies on two different types of media or platforms. This could mean having one on a hard drive and another on a cloud storage solution. Diversifying storage mediums ensures that a failure in one system won't compromise all your backups.
- 1 Off-site Backup: At least one of these copies should be stored off-site, away from the original data. This ensures that in the event of a physical disaster, like a fire or flood, your data remains safe.
Benefits of the 3 2 1 Rule
The 3 2 1 backup rule offers several advantages:
- Reduced Risk of Data Loss: By having multiple copies, the chances of losing all your data are minimal. Even if one backup encounters an issue, you have others to rely on.
- Flexibility in Recovery: With backups on different media and locations, you can choose the most convenient or fastest method to restore your data.
- Protection Against Various Threats: This strategy safeguards against a range of problems, from hardware failures and software bugs to natural disasters. For instance, if your office faces a flood, your off-site backup remains unaffected.
- Cost-Efficiency: While there might be initial costs in setting up multiple backups, the potential loss of critical data can be far more expensive. In the long run, adhering to the 3 2 1 rule can save significant costs related to data recovery and potential business downtimes.
In conclusion, the 3 2 1 backup rule is a robust strategy that provides comprehensive protection for your data. By understanding its components and benefits, one can ensure data safety and seamless recovery when needed.
Implementing the 3 2 1 Rule with Synology
Synology, a renowned brand in the realm of network-attached storage (NAS) solutions, offers a plethora of tools and features that make implementing the 3 2 1 backup rule both efficient and straightforward. Let's explore how one can leverage Synology's capabilities to set up a robust backup system.
Setting Up Multiple Backup Copies
With Synology, setting up multiple backup copies is a breeze:
- Local Backups: Utilizing Synology's DiskStation Manager (DSM), users can easily schedule regular backups to their NAS. For instance, a 4TB Synology NAS might cost around $300, but the value of the data it protects can be immeasurable.
- External Hard Drive Backups: Synology supports direct connections to external hard drives via USB or eSATA ports. A 2TB external hard drive, for instance, might set you back by $80, but it's a worthy investment for an additional layer of data protection.
- Network Backups: For businesses with multiple locations or large networks, Synology offers network backup solutions. This allows data to be backed up across different NAS devices, ensuring redundancy.
Utilizing Synology's Hybrid Cloud Solutions
Synology's hybrid cloud solutions provide the best of both worlds - the speed of local storage and the ubiquity of cloud storage.
- Cloud Sync: With Cloud Sync, users can synchronize their NAS data with popular cloud services like Google Drive, Dropbox, and Amazon S3. The cost of cloud storage varies, but for example, 1TB of storage on Google Drive might cost around $10/month.
- Hyper Backup: This feature allows users to backup their NAS data to various cloud services, ensuring that there's always an off-site copy available. The efficiency of this tool ensures that backups are fast, often completing within a few hours, depending on the data size.
- Data Redundancy: Synology's hybrid solutions ensure that data is not only backed up but also redundant. This means that even if one cloud provider faces an outage, your data remains accessible from another source.
In essence, Synology provides a comprehensive suite of tools that make the 3 2 1 backup rule not just a theoretical concept but a practical, implementable strategy. By investing in a Synology NAS and leveraging its features, users can ensure that their data remains safe, accessible, and protected against a myriad of potential threats.
Comparing Other Backup Strategies
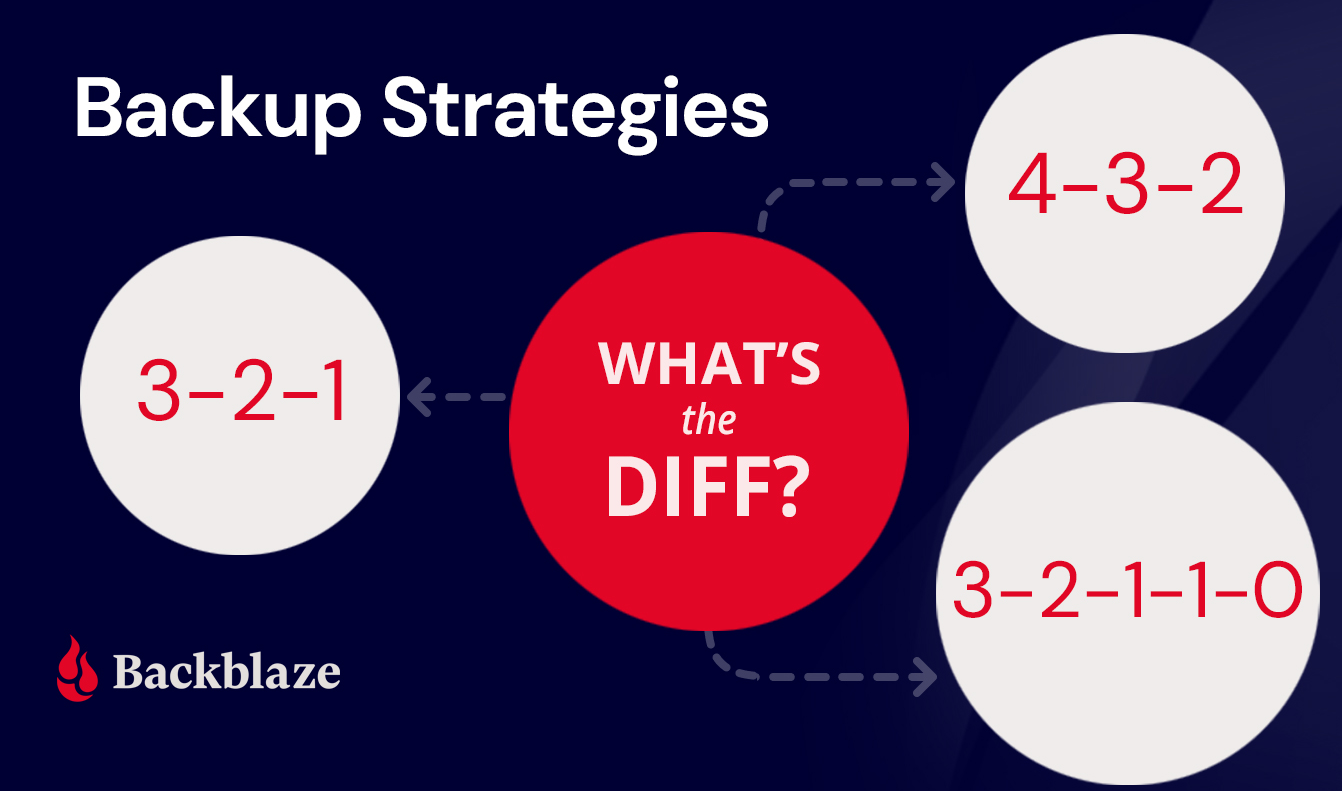
In the vast landscape of data protection, several backup strategies vie for attention. While the 3 2 1 rule is a gold standard, understanding how it stacks up against other methods can provide clarity on its superiority or areas of improvement. Let's dive into a comparative analysis.
Mirror Backup vs. 3 2 1 Rule
Mirror Backup:
- Definition: A mirror backup creates an exact replica of the source data. Any changes made to the original data are immediately reflected in the mirror backup.
- Advantages: Real-time data synchronization ensures that the backup is always up-to-date. This method is particularly useful for databases where real-time data integrity is crucial.
- Disadvantages: Since it's an exact replica, any accidental deletion or corruption in the source data will instantly affect the mirror backup. There's no historical data retention, which can be problematic if you need to revert to a previous state.
- Cost: Implementing a mirror backup solution, especially for large datasets, can be expensive. For a robust system, you might be looking at a starting price of $500, with ongoing maintenance costs.
3 2 1 Rule:
- Advantages: As previously discussed, the 3 2 1 rule offers multiple layers of protection, ensuring data safety even if one backup fails. The off-site storage component also protects against physical threats.
- Disadvantages: Requires more storage solutions, which can increase initial setup costs.
- Cost: While the initial investment might be higher, the long-term benefits and reduced risk of data loss can offset these costs.
Incremental vs. Differential Backups
Incremental Backups:
- Definition: This method backs up only the changes made since the last backup, reducing the amount of data stored.
- Advantages: Faster backup times and reduced storage needs. If you're backing up a 500GB dataset, but only 5GB has changed since the last backup, you only store the 5GB.
- Disadvantages: Restoration can be time-consuming, as it requires the last full backup and all subsequent incremental backups.
- Speed: An incremental backup might take just 10 minutes for 5GB of new data, whereas a full backup could take hours.
Differential Backups:
- Definition: Backs up all changes made since the last full backup.
- Advantages: Faster restoration than incremental backups, as you only need the last full backup and the latest differential backup.
- Disadvantages: As time progresses, differential backups can grow in size, consuming more storage.
- Efficiency: If 50GB of data has changed since the last full backup, a differential backup will store all 50GB, even if only 5GB changed from the day before.
In conclusion, while the 3 2 1 rule is a comprehensive strategy, understanding the nuances, costs, and benefits of other backup methods can help businesses and individuals tailor their backup solutions to their specific needs. Making an informed decision based on these comparisons ensures data integrity and optimal resource utilization.
Restoring Data Using Synology
Restoring data is arguably as crucial as backing it up. After all, a backup is only as good as its ability to restore data when needed. Synology, with its user-friendly interface and robust features, ensures that data restoration is seamless and efficient. Let's delve into the specifics of how one can restore data using Synology.
Steps to Restore from Local Backup
1. Accessing the Backup:
- Start by logging into the Synology DiskStation Manager (DSM). Navigate to the 'Backup & Replication' application.
- Time: Typically, accessing the backup application takes less than a minute, ensuring quick access in urgent situations.
2. Selecting the Backup Task:
- From the list of backup tasks, choose the one you wish to restore.
- Efficiency: The intuitive interface allows users to identify and select backup tasks within seconds.
3. Restoration Process:
- Click on the 'Restore' button. You'll be presented with options to restore the entire backup or select specific files/folders.
- Speed: For a dataset of around 100GB, the restoration process might take approximately 30 minutes to an hour, depending on the hardware specifications.
4. Verification:
- Once the restoration is complete, it's advisable to verify the data. Ensure that files open correctly and databases run without errors.
- Quality: Synology's restoration process maintains the integrity of the data, ensuring that files are restored in their original quality.
Retrieving Data from Cloud Backup
1. Cloud Sync/ Hyper Backup Access:
- Navigate to the respective application on the DSM, be it Cloud Sync or Hyper Backup, depending on where your backup resides.
- Cost: While accessing the application is free, remember that cloud providers might have retrieval costs. For instance, retrieving 500GB from Amazon S3 might cost around $15.
2. Selecting the Backup Data:
- Choose the dataset or specific files you wish to retrieve.
- Time: The time taken will depend on your internet speed. For a 100Mbps connection, retrieving 50GB might take around 1.5 hours.
3. Initiate Retrieval:
- Click on the 'Retrieve' or 'Restore' option. The data will be downloaded and restored to your Synology NAS.
- Efficiency: The process is streamlined to ensure minimal user intervention, making it efficient even for those not tech-savvy.
4. Data Verification:
- As with local backups, always verify the restored data from cloud backups.
- Value: The peace of mind knowing that your restored data is intact and usable is invaluable.
In essence, Synology ensures that the restoration process, whether from local backups or cloud backups, is straightforward and efficient. By following the outlined steps, users can quickly retrieve their data and get back to business with minimal downtime.

Maintaining and Testing Your Backups
Ensuring that backups are not only created but also maintained and tested is paramount for any robust data protection strategy. Regular maintenance ensures that backups are always in optimal condition, while testing guarantees that they can be restored when needed. Here's a detailed look at how to maintain and test backups, especially when using Synology.
Regularly Checking Backup Integrity
1. Scheduled Integrity Checks:
- Synology's DiskStation Manager (DSM) allows users to schedule regular integrity checks. This ensures that backups are free from corruption or errors.
- Frequency: Ideally, integrity checks should be performed monthly. However, for critical data, considering bi-weekly checks might be prudent.
- Cost: While the DSM feature itself is free, remember that running these checks might consume electricity. For a typical NAS running an integrity check, the power consumption might be around 30W, translating to a cost of approximately $0.03 per hour based on average electricity rates.
2. Reviewing Check Logs:
- Post integrity check, DSM provides detailed logs. Regularly reviewing these logs helps identify any potential issues.
- Time: Spending 10 minutes every week to review logs can save hours of potential troubleshooting later.
3. Addressing Issues Promptly:
- If any issues are identified during the integrity checks, address them immediately. This might involve creating a fresh backup or rectifying the identified problem.
- Efficiency: Proactive measures ensure that backups remain in top-notch condition, ready for restoration when needed.
The Importance of Periodic Restoration Tests
1. Scheduled Restoration:
- Apart from checking backup integrity, periodically restoring data from backups is essential. This provides a practical test of the backup's viability.
- Frequency: A quarterly restoration test is a good benchmark. However, for businesses where data is dynamic and changes frequently, monthly tests might be more appropriate.
- Speed: Using Synology, a test restoration of a 200GB dataset might take around 2 hours, depending on the hardware and backup type.
2. Data Verification:
- Post-restoration, always verify the data. Check if files open correctly, applications run without hitches, and databases are error-free.
- Quality: Ensuring that the restored data matches the original in terms of quality and functionality is crucial. Any discrepancies should be noted and addressed.
3. Documenting Test Results:
- Maintain a log of all restoration tests, including the date, data size, time taken, and any issues encountered.
- Value: This documentation provides a historical record, invaluable for audits or understanding backup trends.
In conclusion, while creating backups is essential, their maintenance and testing are equally crucial. By regularly checking backup integrity and conducting periodic restoration tests, one ensures that the backups are not just present but also functional and reliable. Synology's suite of tools and features makes this process efficient, ensuring that data remains protected and accessible at all times.


