To access your QNAP NAS from anywhere, set up a myQNAPcloud account, connect your NAS to it, and complete the CloudLink setup. This way, you can securely reach your files anytime via the internet.
Preparing Your QNAP NAS for Remote Access
Ensuring Your QNAP NAS is Up to Date
To maintain optimal performance and security, your QNAP NAS firmware must be kept up to date. Newer firmware versions often provide enhancements, new features, and security patches that protect against vulnerabilities. You can check the current firmware version and update your QNAP NAS by accessing the "Control Panel" through the QTS interface. Remember, updating your firmware can take anywhere from a few minutes to an hour, depending on your system and connection speed.
Setting Up a Static IP or Dynamic DNS for NAS
To access your QNAP NAS remotely, you'll need a consistent point of contact. A static IP address or Dynamic DNS service enables you to reliably locate your NAS over the internet. While a static IP address doesn't change, making it stable for remote access, it can be expensive and difficult to set up, often requiring a higher-cost internet service plan or complex router configurations.
On the other hand, Dynamic DNS is a more flexible solution. It associates your NAS with a domain name, compensating for a changing IP address and ensuring you can always connect, typically without extra costs. Services like No-IP or DynDNS offer this functionality, sometimes even for free.
Configuring Network Settings and Port Forwarding
Network settings, particularly port forwarding, are crucial for remote access. Port forwarding in your router directs internet traffic to the appropriate devices on your network. For secure NAS access, you'll need to open specific ports, directing this traffic to your QNAP device.
Start by accessing your router’s setup page to configure port forwarding. You'll need to know your NAS's IP address and the ports used by your NAS services, which are usually TCP ports 20, 21, 50, or 443, depending on the services you plan to use remotely. This step ensures direct traffic flow, improving connection speed and reliability. However, note that incorrect port forwarding can expose your NAS to the internet, potentially attracting cyber threats.
Setting Up QNAP CloudLink
Accessing your QNAP NAS remotely through CloudLink is a streamlined, user-friendly process that requires minimal network knowledge, making it an ideal choice for many users. Let's delve deeper into each step necessary to leverage this convenient feature.
Creating a QNAP ID
Before you can start using CloudLink, you need to create a QNAP ID. This ID acts as a gateway to QNAP's diverse services, providing a unified point of access. Navigate to the QNAP account creation page, then enter the required information—typically your email address, which will serve as your username, and a secure password. It's crucial to choose a strong password to prevent unauthorized access. Upon registration, QNAP will send a verification email to confirm your account. Clicking through this email finalizes your QNAP ID creation, officially enrolling you in the QNAP ecosystem.
Enabling CloudLink on QTS
Now, with your QNAP ID set up, you must enable CloudLink in the QTS interface. First, log in to your QNAP NAS interface via your browser. Locate the "myQNAPcloud" application; if it's not installed, download it from the App Center. Open the application, and there will be a prompt to enter your QNAP ID credentials.
Once logged in, find the "CloudLink" option. Clicking on this feature reveals an "Enable" button — a simple click here turns on the CloudLink service. This action creates a secure tunnel between your device and your NAS, bypassing the need for complex network routing or firewall configurations.
Accessing Your QNAP NAS Using CloudLink
With CloudLink active, accessing your NAS remotely becomes a breeze. You can either use QNAP's dedicated mobile apps or a browser for this purpose. For browser access, go to the myQNAPcloud website, and log in with your QNAP ID. Here, your NAS should be listed under your devices. Clicking on your NAS provides instant access through CloudLink, utilizing a secure connection to present your NAS's interface, just as if you were connected to your home network.
For mobile access, download QNAP's mobile apps, such as Qfile for file access or Qmanager for system management tasks. Logging in with your QNAP ID within these apps automatically employs CloudLink, granting you direct access to your NAS's services without the need for additional configurations.
By following these steps, you effectively enable a secure, reliable, and easy-to-use method to access your QNAP NAS from anywhere, enhancing the efficiency and flexibility of your data interaction on the go.
Utilizing VPN for Secure NAS Remote Access
Venturing into the realm of VPNs opens up robust, secure avenues for accessing your QNAP NAS from distant locations. A VPN, or Virtual Private Network, establishes encrypted connections, often rendering your remote access as secure as local access. Below, we explore the intricacies of setting up and leveraging a VPN for your QNAP system.
Overview of VPN Connection
A VPN cloaks your internet traffic, preventing outsiders from spying on data transmissions between your remote device and your QNAP NAS. Essentially, it creates a "private tunnel" over the public internet, shielding your data from potential eavesdroppers. This level of protection is crucial, especially when accessing sensitive data on your NAS from public or untrusted internet connections, like Wi-Fi hotspots in cafes or airports.
Configuring QNAP's Built-in VPN Server
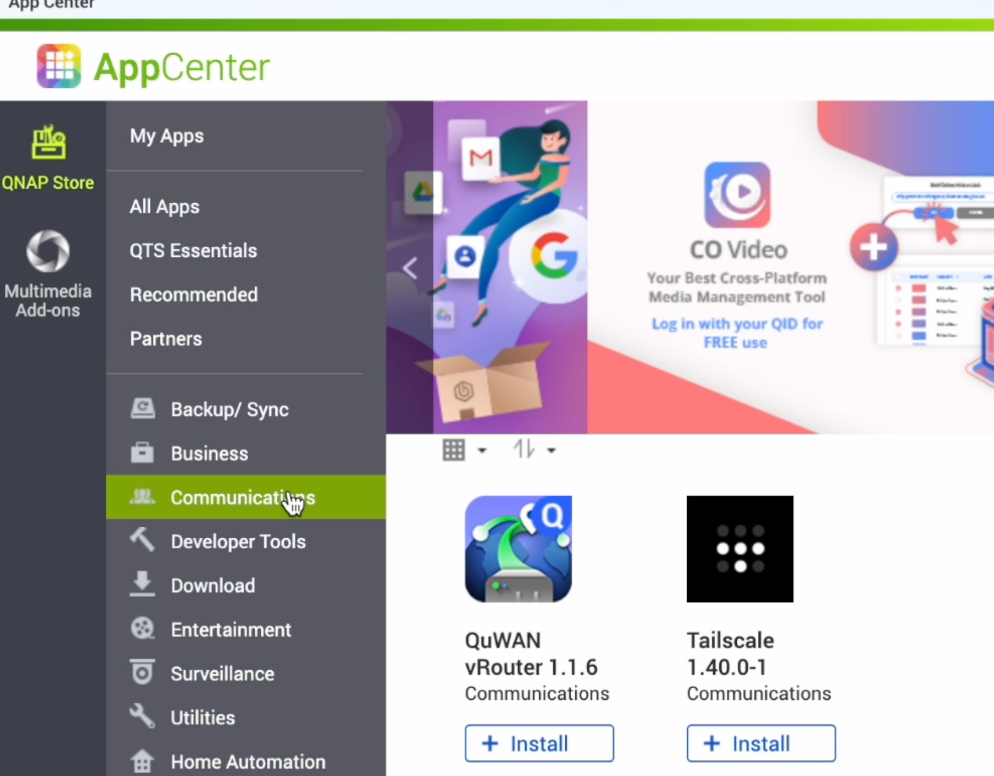
Your QNAP NAS isn’t just a storage solution; it’s a multi-faceted device equipped with its own VPN server functionality, eliminating the need for third-party VPN services. To initiate this, navigate to the QTS interface, then open the "App Center." Here, locate and install the "QVPN Service" app from QNAP.
Upon launching QVPN, select the “VPN Server” tab, and you’ll see options for different VPN protocols, such as L2TP/IPSec, OpenVPN, or PPTP. While L2TP/IPSec offers a balanced performance between security and speed, OpenVPN guarantees a highly secure, albeit slightly slower connection. In contrast, PPTP provides faster speeds but comes with weaker security — a less recommended choice for sensitive data.
After selecting your preferred protocol, move on to configure the details, including port settings, IP address allocation, and encryption methods. Notably, stronger encryption, while offering more secure connections, may lead to slower performance. Therefore, it's a delicate balance that you must strike based on your security needs and performance expectations.
Connecting to Your NAS via VPN
With your VPN server up and running, you need to configure your client device to connect to it. For mobile devices, download a VPN client app that matches the protocol you selected. For computers, built-in VPN client settings available in most operating systems will suffice.
Input the necessary information in the client settings, including your NAS’s public IP address or domain name, the chosen VPN protocol, and the corresponding port number. Additionally, you’ll need to enter the login credentials set up for VPN access on your NAS.
After configuration, initiate the connection. If all details are correct, your device will connect to your QNAP NAS through a secure VPN tunnel. Now, you can access your NAS as if you're on the local network, benefiting from the enhanced security and privacy this connection method provides.
By effectively setting up and utilizing a VPN, you ensure a highly secure method of remote access to your QNAP NAS, safeguarding your data transmissions from the prying eyes often present on the internet. This approach, while slightly more complex, offers peace of mind, especially when handling sensitive personal or business data.
Remote Access via myQNAPcloud Service
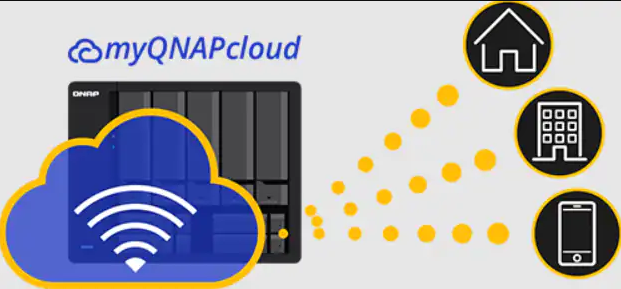
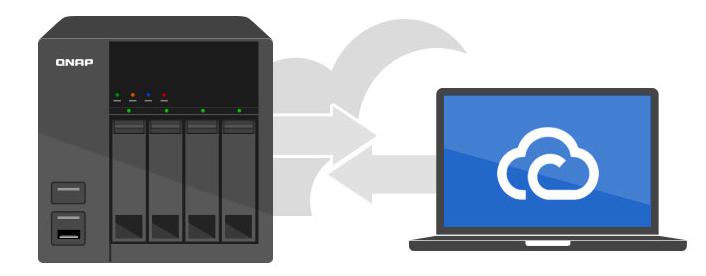
The myQNAPcloud service acts as a bridge between your NAS and the internet, simplifying the connection process. This feature-rich service enhances your ability to access, share, and manage files remotely. Here's how you can fully harness its capabilities.
Registering Your NAS with myQNAPcloud
First, to tap into the power of remote accessibility, you must link your device to the service. Start by opening the myQNAPcloud app on the NAS. If you haven't installed it yet, find it in the QTS App Center.
Upon launching the app, it prompts you to log in to your QNAP account. If you don't have one, the system will guide you through a straightforward setup process. Once logged in, you'll need to register your device. The app will ask for a unique name for your NAS to create an easy-to-remember domain (e.g., yourNAS.myqnapcloud.com).
Navigating the myQNAPcloud Dashboard
Now that you've established the connection, explore the myQNAPcloud dashboard. This interface is your command center, offering access to various settings and features. Here, you can manage access controls, letting you decide who can reach your NAS remotely, and to what extent. You'll also find security settings, allowing you to implement protective measures like encryption and anti-virus checks, fortifying your NAS's defenses.
The dashboard also provides a network status overview, showing your online status, connection type, and any potential issues that could affect remote access. If you encounter connectivity problems, the built-in diagnosis tools can help identify and resolve these hitches.
Accessing and Managing Files via myQNAPcloud
Accessing your files remotely via myQNAPcloud mimics the experience you’d have while connected locally. You can navigate through your folders, download documents, stream media, or even manage user permissions, all through a standard web browser. This browser-based access means there's no need for additional software, making file access convenient from any device.
To manage files, simply log in to the myQNAPcloud portal and select your device. The interface will shift to display your NAS storage, complete with all your sorted folders and files. You can perform a range of actions here — for instance, clicking on a file lets you download it, while right-clicking reveals more options like renaming, moving, or deleting. If you're handling multimedia files, you can even stream them directly over your browser.
For user permissions, the portal lets you control who accesses what. You can create specific links to files or folders, granting temporary access, or set up user accounts for more permanent entrants. This way, sharing content with colleagues, friends, or family remains secure and selective.
In essence, by properly setting up and utilizing the myQNAPcloud service, you unlock a level of convenience and security in remote NAS access. This approach consolidates many remote access features, offering a comprehensive solution that stands strong amid various internet connectivity scenarios.
Using QNAP Mobile Apps for Remote Access
In today's fast-paced world, mobile access to your data proves not just convenient but necessary for on-the-go efficiency. QNAP offers various mobile apps designed for different purposes, enhancing your experience and productivity. We will delve into these apps and explain how to get the most out of them.
Overview of QNAP Mobile Apps
QNAP provides a suite of mobile applications, each serving unique purposes. For general file access and management, Qfile is your go-to app, making browsing through your NAS's content from your smartphone effortless. If streaming media is your priority, Qmedia plays a central role, allowing access to your videos, music, and photos. Other apps, such as Qmanager, facilitate monitoring and managing your NAS system remotely, while Qsirch helps you find files quickly.
These applications form an ecosystem, ensuring that you have robust control and access to your NAS no matter where you are.
Configuring NAS Access on Qfile
Qfile acts as your mobile file manager. To begin, download Qfile from your device's respective app store. Upon launching the app, it prompts you to add your NAS. Here, you need to enter your NAS’s credentials, including its name or IP address, and the login information.
Once connected, Qfile presents your NAS’s file structure in a simple interface, similar to how you’d view files on your device. You can navigate folders, download files for offline access, or even upload new files from your phone. For example, after a meeting, you can immediately upload a digitally signed PDF document to your NAS without touching a computer.
Additionally, Qfile offers a sharing function, where you can generate download links for your files, making sharing with external parties convenient while maintaining your data’s security.
Streamlining Media Access via Qmedia
For those with extensive media libraries, Qmedia provides a seamless streaming experience. After installing Qmedia on your device, link it to your NAS by logging in. The app integrates with the NAS’s media service, presenting your media files in an easy-to-navigate format.
You can browse through your collections and select videos, songs, or photos. The streaming happens in real-time with a stable internet connection, meaning you won’t need to fill up your device’s storage with large files. Imagine traveling: instead of pre-downloading a season of your favorite show, you can stream episodes straight from your NAS.
Moreover, Qmedia allows for easy sorting, searching, and even creating playlists. Whether you’re showing vacation photos to friends or playing music at a party, your media library is always at your fingertips.
Through these dedicated mobile apps, QNAP enhances the accessibility and convenience of your NAS, making sure that you remain productive and entertained. Each app integrates deeply with the NAS’s features, ensuring you don’t miss out on anything, even when you're thousands of miles away from home.
Advanced Tips for Remote NAS Access
Mastering the basics of remote access to your QNAP NAS sets a solid foundation. Yet, delving deeper into advanced settings and practices can optimize your experience, boosting security, efficiency, and convenience. This section explores nuanced tips that can transform a standard remote access setup into a highly tailored, professional-grade network environment.
Optimizing Network Speeds
Network speeds dictate the efficiency of data transfers between your remote device and NAS. Slow speeds can cripple the experience, causing frustrating delays in accessing files or streaming media. To counteract this, you need to ensure optimal settings.
- Bandwidth Control: Within the QNAP interface, you can manage bandwidth allocations. Prioritize tasks requiring more speed, like large file transfers or HD streaming, to ensure they're not hindered by less critical data transfers.
- Network Infrastructure: Invest in high-quality networking equipment. Gigabit routers and switches can significantly enhance data transfer rates. The initial cost, potentially ranging from $100 to $1000, reflects in vastly improved performance, especially for heavy data tasks.
- Internet Service: Your Internet Service Provider (ISP) package plays a critical role. Higher bandwidth plans offer better upload and download speeds, contributing to smoother remote access. Balancing cost and need is essential here, as plans can range from $50 to several hundred dollars.
Setting Up Multi-verification Login
Enhancing security becomes paramount as you access your NAS across the internet. Multi-verification, also known as Two-Factor Authentication (2FA), adds an extra layer of security during the login process.
- Enabling 2FA: In the NAS settings, under the security options, you'll find the steps to enable 2FA. It usually requires linking with authentication apps like Google Authenticator or Authy, which involve minimal costs or are often free.
- Login Process: With 2FA enabled, each login attempt prompts a code from your authentication app. It means that even if someone discovers your password, they can't access your NAS without the code, providing a safety net against unauthorized access.
Troubleshooting Common Access Issues
Encountering issues during remote access is not uncommon, but knowing how to troubleshoot can save time and stress. Here are common problems and how to resolve them:
- Connectivity Issues: If you can't connect to the NAS, first check your internet connection. Next, verify the NAS status via Qmanager to ensure it's online. If these elements are functional, the issue might relate to your ISP blocking ports used for remote access, which requires contacting your provider or reconfiguring port settings.
- Slow Access: Experience lagging? This issue often ties back to network speeds. Refer to the optimization segment above for tips on enhancing speed. Monitoring NAS performance via Qmanager can also shed light on any system inefficiencies.
- Security Alerts: Receiving security alerts can be jarring. If you suspect an actual security breach, immediately change your login credentials. Next, review your NAS’s security logs to understand the nature of the alert. Implementing IP blocking for repeated unauthorized login attempts can also fortify your system's defenses.
By incorporating these advanced practices, you are not just accessing your NAS remotely; you are doing so with an emphasis on efficiency, security, and optimal performance. These steps help create a resilient environment, ensuring your data is not only accessible but also protected, catering to a seamless remote interaction with your QNAP NAS.
Security Considerations for Remote Access
Accessing your QNAP NAS remotely brings immense convenience and flexibility. However, the bridge you build between the internet and your private storage also opens a potential path for security threats. This section underscores the essential security practices, ensuring that you shield your data's privacy and integrity while enjoying unrestricted access.
Establishing Secure Connections
A secure connection is your first defense against potential intrusions or data breaches. Implementing these can seem technical but are crucial steps in fortifying your remote access.
- Use of VPNs: Establishing a VPN (Virtual Private Network) for your NAS device is like creating a secure tunnel for your data traffic. It encrypts data packets, disguises your digital footprint, and prevents unwanted snooping. VPN services come at varying prices, typically ranging from $3 to $10 per month, based on the provider and plan complexity.
- SSL Certificates: SSL (Secure Sockets Layer) certificates create a secure layer over your regular HTTP connection. By installing an SSL certificate on your NAS, you encrypt the communication between your remote device and NAS, thwarting any interception attempts. The cost of SSL certificates can range from free (Let's Encrypt) to a few hundred dollars annually, depending on the level of validation required.
- Firewalls: Don't overlook the firewall settings of your NAS and networking equipment. Custom rules that explicitly define the kind of traffic allowed to and from your NAS add an extra barrier against potential intruders.
Regularly Updating Your QNAP NAS Firmware
Keeping your NAS firmware up to date is not a mere performance issue. Each update not only enhances features and fixes bugs but also patches security vulnerabilities.
- Scheduled Checks: Set your NAS to automatically check for updates. Regular updates mean you are less likely to miss out on crucial security patches. These firmware updates are typically free, included in your device's support.
- Understanding Update Logs: When updates appear, they come with changelogs. Take a moment to go through these logs as they outline the changes, with critical security patches usually highlighted.
- Caution with Beta Versions: While trying the latest features in beta firmware versions can be tempting, they may pose unforeseen security risks. Sticking to the stable release channels is a safer bet for your data's security.
Implementing Strong Password Policies and Encryption
Your data's frontline defense is often a password, making robust password policies instrumental in securing your NAS.
- Complex Password Creation: Avoid predictable passwords. Instead, opt for complexity through a mix of letters, numbers, and symbols. While these are tougher to remember, they're also significantly harder for intruders to guess.
- Password Managers: To handle the difficulty of remembering complex passwords, using a password manager can be invaluable. These services manage your passwords securely, and their cost is usually nominal, with many reliable options available from $20 to $60 annually.
- Data Encryption: For sensitive files, QNAP NAS offers on-the-fly or full-volume encryption. By encrypting files or whole volumes, you ensure that, even in a breach scenario, your confidential data remains unintelligible to the intruder. Remember, enabling encryption may slightly slow down data access times due to the decryption process needed as you access your files.
Focusing on these security aspects ensures that your remote access setup for QNAP NAS stands resilient against the myriad of threats lurking online. By being proactive and security-conscious, you safeguard your peace of mind, knowing your data is tightly secured.

