Yes, you can install an SSD in your Synology NAS. First, ensure the SSD's size and interface type match your NAS model's specifications. Then, turn off the NAS, install the SSD in an available drive bay, and secure it. After powering on the NAS, initialize the SSD through the DiskStation Manager interface for optimal performance and data protection.
Table of Contents
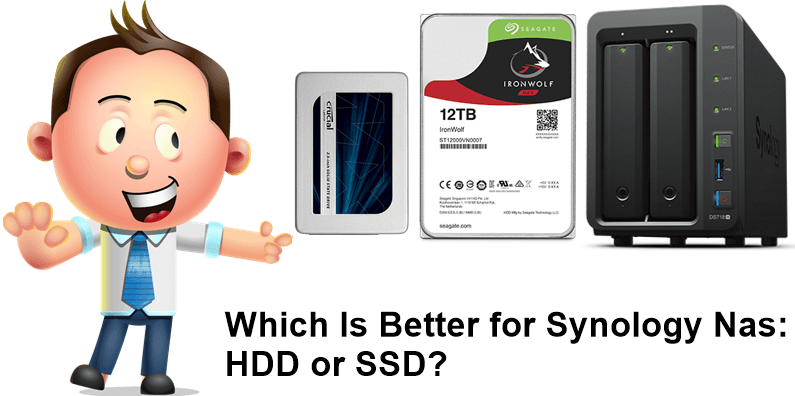
Understanding NAS and SSD Compatibility
Supported NAS Models and SSD Types
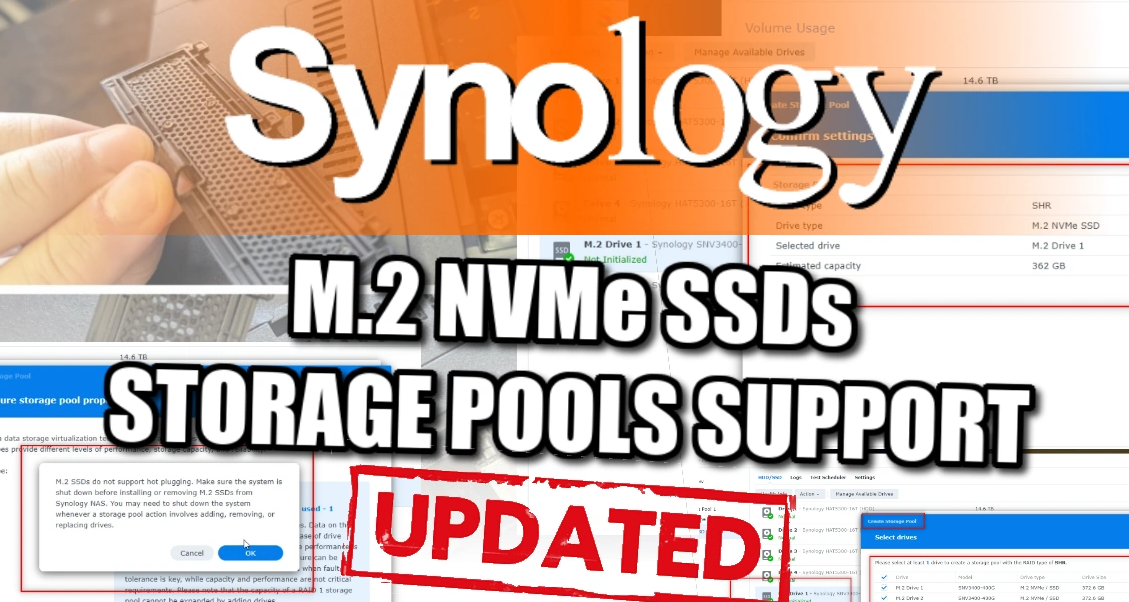
To ensure successful integration, it's crucial to match the right type of SSD with your Synology NAS. Most modern Synology NAS models support 2.5-inch SATA SSDs, renowned for their reliability and compatibility. However, newer models may also support NVMe SSDs, which offer faster data transfer speeds. It's essential to check your NAS model's specifications on Synology's official website to determine the compatible SSD type.
Firmware and Software Considerations
The NAS firmware plays a pivotal role in SSD compatibility. Synology regularly updates its DiskStation Manager (DSM) software, enhancing support for newer SSDs. Running the latest DSM version ensures optimal performance and compatibility. Users can easily update their NAS firmware through the DSM interface, ensuring their system stays compatible with newer SSD models.
Understanding Interface and Speed Limitations
Synology NAS devices usually come with specific interface types, such as SATA III, which has a theoretical maximum speed of 6 Gb/s. When selecting an SSD, it's important to match the SSD's interface type with that of the NAS to avoid bottlenecks. While NVMe SSDs offer higher speeds, they are only beneficial if the NAS supports NVMe interfaces. Overlooking this aspect can lead to underutilization of the SSD's potential.
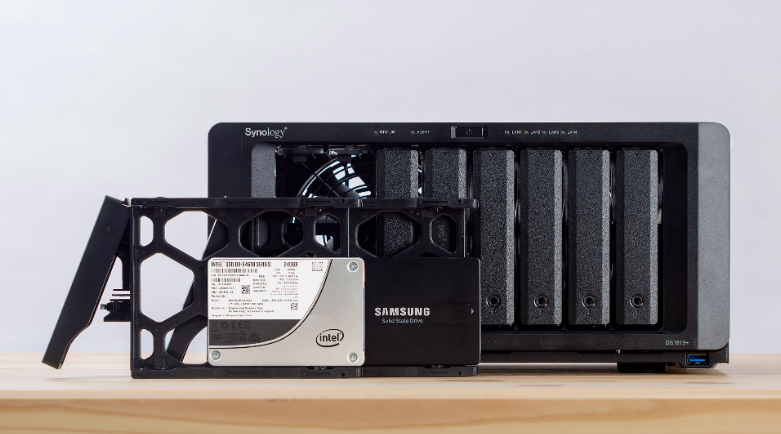
Physical Size and Form Factor
Physical compatibility is another critical aspect. Most Synology NAS devices accommodate 2.5-inch SSDs, the standard size for SATA SSDs. However, for NVMe SSDs, the form factor might differ. Checking the NAS's drive bay dimensions and the SSD's physical size ensures a perfect fit. Incorrect sizing can lead to installation difficulties or, worse, damage to the NAS or the SSD.
In conclusion, understanding the compatibility between your Synology NAS and potential SSD upgrades involves careful consideration of the NAS model, firmware version, interface type, and physical dimensions. Ensuring compatibility in these areas leads to a smooth upgrade process, unlocking the full potential of your NAS with improved performance and reliability.
Types of SSDs Compatible with Synology NAS
SATA vs. NVMe SSDs
When exploring SSD options for Synology NAS, it's vital to distinguish between SATA and NVMe SSDs. SATA SSDs, commonly featuring a 2.5-inch form factor, offer a balance of performance and cost-effectiveness, with typical read/write speeds around 550/520 MB/s. On the other hand, NVMe SSDs provide significantly higher speeds, up to 3500 MB/s for read and 3000 MB/s for write operations, but at a higher cost. The choice hinges on the specific NAS model and the user's performance requirements.
Capacity and Cost
SSD capacities can range from 250GB to 4TB, impacting both performance and cost. A higher capacity SSD, such as a 2TB model, might cost around $200-$300, while a 500GB SSD could be priced under $100. Balancing capacity with budget constraints is key. Users should also consider future storage needs to avoid frequent upgrades.
Power Consumption and Heat Dissipation
SSDs are more energy-efficient than traditional HDDs, consuming approximately 2-3 watts when active, compared to 6-7 watts for HDDs. This lower power consumption translates to reduced heat generation, which is crucial in a NAS environment to maintain system stability and longevity.
Endurance and Reliability
The endurance of an SSD is measured in Terabytes Written (TBW). Higher-end SSDs offer a TBW of up to 1200 TB, ensuring longevity even under heavy use. SSDs also come with technology like Dynamic Thermal Guard to prevent overheating, further enhancing their reliability.
Manufacturer and Warranty
Choosing SSDs from reputable manufacturers is crucial for reliability and support. Brands like Samsung, Crucial, and Western Digital offer extensive warranties, usually 3-5 years, adding a layer of security to the investment. Manufacturer support can be invaluable in troubleshooting and ensuring the SSD's longevity.
In summary, selecting the right SSD for a Synology NAS involves a careful examination of SSD types (SATA or NVMe), balancing capacity and cost, understanding power consumption, ensuring endurance, and choosing a reliable manufacturer. This comprehensive approach ensures that the SSD not only fits the NAS system but also meets the user's performance and budgetary needs while providing long-term reliability and support.
Benefits of SSD in Synology NAS
Enhanced Data Access Speed
The most notable benefit of using SSDs in Synology NAS is the remarkable boost in data access speeds. Where traditional hard drives offer speeds around 100-200 MB/s, SSDs can provide speeds up to 550 MB/s for SATA and up to 3500 MB/s for NVMe SSDs. This speed enhancement dramatically improves file transfer rates and reduces latency in data access, making SSDs ideal for intensive data operations and applications requiring high-speed data retrieval.
Increased System Responsiveness
SSDs contribute significantly to the overall system responsiveness of a NAS. With faster boot times and quicker application loading, operations become more efficient. This is particularly beneficial in environments where multiple users access the NAS simultaneously, as it ensures smoother and faster data handling, reducing wait times and enhancing user experience.
Durability and Reliability
SSDs have no moving parts, unlike traditional hard drives. This lack of mechanical components makes them more resistant to physical shock, reducing the risk of data loss due to physical damage. Furthermore, SSDs generally have a lower failure rate compared to HDDs, enhancing the reliability of the storage system. This durability is crucial for NAS systems that often store critical or sensitive data.
Energy Efficiency and Lower Heat Production
SSDs consume less power than traditional hard drives, usually around 2-3 watts when active, compared to 6-7 watts for HDDs. This reduced power consumption leads to less heat production, a critical factor in maintaining the longevity and stability of NAS systems. Lower heat generation also means that the cooling requirements are reduced, which can lead to quieter system operation and potentially lower electricity costs.
Longer Lifespan and Lower Long-Term Costs
While the initial cost of SSDs might be higher than HDDs, their longer lifespan can lead to lower long-term costs. With advancements in SSD technology, the endurance of these drives has significantly increased, making them a more cost-effective solution over time, especially when considering their lower failure rates and reduced maintenance needs.
In summary, integrating SSDs into a Synology NAS offers multiple benefits, including enhanced data access speed, increased system responsiveness, improved durability and reliability, energy efficiency with lower heat production, and a potentially longer lifespan that can offset the higher initial investment. These advantages make SSDs a compelling choice for upgrading NAS systems, particularly in environments where performance and reliability are paramount.
Installation Process for SSD in Synology NAS
Step-by-Step Installation Guide
Preparation: Before beginning, ensure you have a compatible SSD for your Synology NAS model. Gather necessary tools like a screwdriver, and if required, an anti-static wrist strap to prevent electrostatic discharge (ESD).
Power Down the NAS: Safely shut down your Synology NAS to avoid any data loss or damage to the system.
Accessing the Drive Bay: Open the NAS enclosure to access the drive bay. This process varies by model, so refer to the user manual for specific instructions.
Installing the SSD: Slide the SSD into the drive bay, aligning it with the SATA or NVMe connector, depending on the SSD type. Secure the SSD using the provided screws or mounting brackets.
Reassembling the NAS: Once the SSD is firmly in place, reassemble the NAS enclosure and reconnect any cables.
Tools and Equipment Needed
Screwdriver: A standard Phillips head screwdriver is usually sufficient for most installations.
Anti-Static Wrist Strap (optional): Useful to prevent ESD, which can damage electronic components.
Mounting Screws or Brackets: Usually provided with the NAS or SSD.
Safety Precautions and Best Practices
Avoiding ESD: ESD can damage electronic components. Using an anti-static wrist strap or grounding yourself by touching a metal object before handling the SSD can prevent this.
Handling with Care: Handle the SSD gently to avoid damaging the connectors.
Ensuring Proper Alignment: Incorrectly aligning the SSD with the connector can cause damage. Ensure the SSD is correctly seated before applying pressure.
Confirming Successful Installation
After installation, power on the NAS and access the DSM interface to confirm that the NAS recognizes the new SSD. This can typically be done in the storage manager section of the DSM.
Post-Installation Checklist
Check for Proper Recognition: Ensure the SSD is recognized and functioning correctly in the DSM.
Monitor Initial Performance: After installation, monitor the NAS for any unusual behavior or performance issues.
In conclusion, installing an SSD in a Synology NAS is a straightforward process that can significantly enhance the system's performance. Careful preparation, following the step-by-step guide, using the right tools, and adhering to safety precautions ensures a successful installation. Once installed, verifying that the NAS correctly recognizes the SSD and monitoring initial performance are critical final steps in the installation process.
Configuration and Setup of SSD in Synology NAS
Initializing the SSD on Synology NAS
Access DSM Interface: Log in to the DiskStation Manager (DSM) interface after installing the SSD.
Disk Initialization: Navigate to the Storage Manager. The newly installed SSD should appear as an unallocated disk. Initialize the disk by creating a new volume or adding it to an existing storage pool, depending on your requirements.
Choosing File System: For most users, the Btrfs file system offers advanced features like snapshot replication and better data integrity. However, some may prefer the ext4 file system for its simplicity and slightly better performance with smaller files.
Configuring RAID and Storage Pools
RAID Configuration: If you are using multiple SSDs, consider setting up a RAID configuration for redundancy and performance. RAID 1 is recommended for mirroring data across SSDs, providing data protection in case of a drive failure.
Storage Pool Optimization: In the DSM, optimize the storage pool for SSD usage. This includes enabling features like SSD TRIM, which helps in maintaining the SSD's performance over time.
Optimizing Settings for SSD Usage
Enabling SSD Cache: If the NAS model supports it, enable SSD caching. This feature significantly improves read and write speeds for frequently accessed data.
Adjusting Network Settings: To fully utilize the speed of the SSD, ensure that the network settings on your NAS are optimized. For instance, enabling Link Aggregation can improve network throughput, particularly beneficial for NAS systems connected to high-speed networks.
Performance Monitoring and Fine-Tuning
Monitor Performance: Regularly check the performance of the SSD through the DSM. Look for any anomalies or significant drops in speed, which could indicate an issue.
Software Updates: Keep the DSM software updated. Synology frequently releases updates that can improve SSD performance and compatibility.
Backup and Data Protection
Regular Backups: Despite the reliability of SSDs, regular backups are essential. Use Synology's Hyper Backup or similar tools to schedule regular backups of your data.
Snapshot and Replication: For Btrfs file systems, use the snapshot and replication features to protect against data corruption and accidental deletion.
In summary, configuring and setting up an SSD in a Synology NAS involves initializing the SSD, setting up RAID configurations if necessary, optimizing storage pool and network settings for SSD usage, and regular performance monitoring. Additionally, enabling features like SSD caching and ensuring regular backups are crucial steps in maintaining the SSD's performance and safeguarding data. With these steps, users can fully leverage the benefits of SSDs in their NAS systems, ensuring high performance and data reliability.
Troubleshooting and Maintenance of SSD in Synology NAS
Common Installation Issues and Solutions
SSD Not Recognized: If the SSD is not recognized post-installation, check if it's properly seated in the slot. Verify the compatibility of the SSD with your Synology model. Sometimes, updating the NAS firmware can resolve recognition issues.
Slow Performance: If the SSD seems slower than expected, ensure it's configured correctly in the DSM. Check for any firmware updates for the SSD itself, as manufacturers often release updates that improve performance and compatibility.
Firmware Updates and SSD Health Monitoring
Regular Firmware Updates: Keep both the NAS and SSD firmware up-to-date. These updates can resolve known issues and improve overall performance and compatibility.
Monitoring SSD Health: Use the DSM’s built-in tools to monitor the health and performance of the SSD. Pay attention to metrics like the wear level and reallocated sector count, as these can indicate when it’s time to replace the SSD.
Long-Term Maintenance Tips
Regular Cleaning: Physically cleaning the NAS, ensuring vents and fans are dust-free, can prevent overheating, which is crucial for maintaining SSD performance and longevity.
Data Management: Regularly managing the data on your NAS, such as deleting unnecessary files and defragmenting the drive (if using an ext4 file system), can help maintain SSD performance.
Avoiding Overload: Don’t overload the SSD to its full capacity; try to maintain at least 10-20% free space to optimize performance.
Balancing Cost and Performance
Cost-Efficiency: Regular maintenance and monitoring can extend the life of your SSD, providing a cost-efficient storage solution.
Performance Optimization: By balancing the load and properly configuring the SSD, you can ensure optimal performance without incurring additional costs.
In conclusion, effective troubleshooting and regular maintenance of an SSD in a Synology NAS are key to ensuring its long-term performance and reliability. Addressing common installation issues, keeping the firmware updated, and monitoring the SSD’s health are essential steps. Additionally, following maintenance tips such as regular cleaning, data management, and avoiding overloading the SSD, as well as balancing cost and performance, can greatly enhance the lifespan and efficiency of your SSD in a NAS environment.